Mortar Bridging Behind New Brickwork Before Lock-up
Why the gap behind the brickwork matters
The outside of your new brick wall looks neat, but a photo taken during construction shows mortar sticking out behind it. The useful question is whether the mortar occupies part of the drainage space, spans it or has collected where water is meant to leave the wall. Those conditions can look similar from one angle. The best time to clarify which one you have is while the builder can still show the back of the brickwork or arrange a safe view of the affected area.
In a typical brick veneer wall, the outside brickwork sits in front of the supporting frame. The gap behind it separates the layers. In a cavity drainage detail, water that makes its way through the outer masonry can run down to flashing and leave through the intended outlets. A bridge of hardened mortar can provide a path towards the inner side, while a mound at the base can interfere with drainage. Which risk matters depends on where the material sits, what it touches and how that section of the wall was designed to drain.
Ask for a cavity drainage check before concealment. Tell the builder which wall you are asking about and share the original photograph with its context. If the wall is still being built, a lock-up stage inspection can be timed around the details that remain visible. For some projects that useful window comes before the builder formally calls the property locked up.
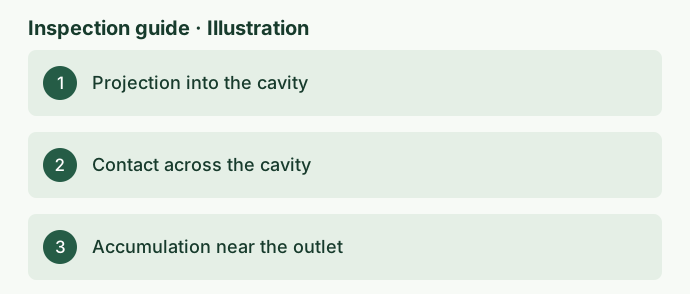
Three observations to keep separate
A mortar projection is material extending from the back of the brickwork. A photograph may show its shape clearly without showing the remaining clearance. Nearby wall wrap, sheet bracing or a service can also take up some of the available space. Ask for a view that establishes the relationship between the projection and the opposing surface. A narrow-looking gap in an oblique photograph is hard to assess because the perspective compresses the distance between the two layers.
A bridge is a connection across the gap. If you can clearly see hardened mortar in contact with both sides, describe exactly where the contact is visible. A photograph of one connection can support a finding at that point. It cannot establish the frequency of contact along the entire wall. A further inspection may need to distinguish an isolated lump from a recurring pattern, especially if the frame detail or brick set-out changes across the elevation.
At the base, falling mortar can collect above or near the flashing. A face opening can look clear while material further behind it interferes with the route water would take. Our guide to blocked or missing weep holes covers the outlet you can see from outside. Here the question is what lies between the inside of the cavity and that outlet. Ask the builder to show how that part of the assembly drains before relying on the appearance of the opening.
Where to ask for a closer look
Start by locating the photographed area on the plan. An external corner, window opening, garage return or a change in cladding gives everyone a reference. Ask for one broad photo showing the location and one close photo showing the material and adjacent surface. If someone photographed the spot while bricklaying was underway, record the date and the approximate course or height. A close shot of grey mortar without a location is difficult to match to later work.
Prioritise places where the wall detail changes. Near an opening, flashing and associated details can redirect water towards the exterior. Near a change in floor level or a lower roof abutting a taller wall, the drainage detail may differ from the base of a straight ground-floor wall. Our window flashing guide explains why a window head deserves its own review. Use the applicable drawing to identify the relevant route before treating one detail as representative of the whole house.
Check whether the camera is showing the frame, membrane or a temporary object. Material can look as if it touches the opposite side when the two objects simply overlap in the image. Equally, flexible membrane can bow towards masonry between fixings and reduce the remaining space. A photo of the nominal frame line tells you little about the gap at that point unless it also shows any material that projects beyond it. Where access allows, the inspector can record the actual surfaces seen.
Use the drawing and the applicable requirements
The Australian Building Codes Board’s 2022 Housing Provisions explain cavity clearance and drainage in Part 5.7, subject to its application provisions. Think Brick Australia publishes generic drawings that help illustrate how different wall arrangements work. Ask the builder or building surveyor to identify the applicable edition, pathway and detail for your project. A generic drawing can help you frame the question, but the approved project documents and applicable requirements guide assessment of the specific assembly.
A wall tie is meant to connect the veneer to its support where the wall system calls for it. Finding a metal connector crossing the cavity is a different observation from finding a broad mortar deposit spanning the space. If your concern is tie placement or fixing, see our guide to brick veneer wall ties. When discussing a photograph with the builder, identify the metal component and any surrounding mortar separately so the response can address both.
The inspection scope is visual and depends on authorised access and construction progress. A person standing at ground level cannot see the entire back of a completed wall, and the line of sight through a weep opening is limited. A cavity can be partly concealed even before plaster goes on. Ask what could actually be examined and record the inaccessible parts. Additional access, investigation or a repair proposal can then be coordinated with the builder and appropriate practitioners if the available evidence warrants it.
Do not reach into a cavity, scrape mortar out or enter scaffold to improve the photograph. Access needs to be agreed with the builder, and disturbance can damage a membrane or flashing and alter the condition the inspection was meant to record. If a broad view is possible from a safe position, include a visible feature such as a window jamb or corner. Ask the builder to arrange any closer access through the site’s normal procedures.
Agree in advance what evidence will close the issue. A general assurance about all masonry will not locate the garage return or show its drainage path. Ask for location-specific evidence, and if a proposed change would affect the wall assembly, ask who will assess that detail before it is covered. Keep the written response together with the original observation.
Illustrative scenario at a garage return
Imagine a homeowner receives a progress photo of a garage return. It shows several mortar projections and what looks like a pile beside the first courses. The homeowner wonders if the builder should remove the whole return. An inspection request that identifies the particular wall, asks whether the apparent pile is in the drainage path and seeks confirmation of the applicable detail gives the builder something concrete to investigate. Starting with the extent of demolition would skip over the question of what the picture shows.
At the next authorised visit, a clearer angle might reveal that the projection sits well back from the inner surface and the apparent pile is outside the relevant drainage zone. It might instead show contact with the inner surface or a collection over the flashing. In the first case, the original image has been clarified at that location. In the second, the location, nature and visible extent of the concern can be documented for the builder to address, with further checking where the pattern may recur.
Keep the earlier image alongside the later one. Without the comparison, it can be difficult to tell whether the second image shows the same place, a repaired area or a different wall entirely. When the builder offers a completion photo, ask which location it shows and which observation was addressed. The ClearScope report examples show the format of inspection reporting and how photographs can support a location-specific finding.
Set the next check before the evidence disappears
Ask the builder for the next point in the programme when the wall is accessible and the relevant detail will still be visible. If part of the elevation is already concealed, request any dated construction photographs showing the drainage detail during installation. Write down which areas the photographs cover and which remain unverified. Where a concern is isolated and accessible, the builder can explain the proposed correction and how they intend to protect surrounding components while addressing it.
A useful inspection finding separates the visible condition, the possible consequence and the next step. For example, the report could identify hardened material visible at the garage return, explain why contact or blockage there may matter and request the builder verify the extent and drainage detail. That structure keeps uncertainty visible and gives the builder a defined response. If material has already been removed, record when it happened and ask what evidence is available to show the area after the work.
Conditions around the bottom of the wall can change later as concrete, garden beds and paths are installed. Record the state of the site during the cavity check so an outlet visible today can be compared with the finished levels later. If work has reached completion and you can only see the outside face, a PCI or handover inspection can document visible outlets and adjacent finishes within its scope. Earlier photographs and drawings are particularly valuable at that stage because the internal drainage path is usually concealed.
To organise a visit, send the address, builder’s programme, affected elevation, latest wall detail if available and any progress photographs. Mention when the next trade will cover the area and how access will be arranged. That lets the inspector explain what can be seen at the proposed visit and whether an earlier or differently scoped inspection would be more useful. Where access is safe and the condition is still exposed, the builder has a better chance of reviewing it while the evidence is in front of everyone.
References
Ask ClearScope about your property
Send the site address, the current stage, your available plans and the builder’s timing for the next work.
Request an inspection