New-Build Inspections — Cavity Sliding Doors at Fix Stage
Your new sliding door moves most of the way, then catches just before it closes. The builder says it will be adjusted later. The useful question at fix stage is what can be checked now, and whether the parts needed to diagnose the fault will still be accessible when the adjustment is due. A door that is waiting for its final handle is a different matter from a fitted door that scrapes a freshly painted jamb.
A fix-stage inspection can record how an accessible door operates, what remains unfinished and which items need a demonstration before handover. If the leaf has yet to be hung, it is still possible to discuss the installation sequence with the builder, but the operation of the finished door will need a later check.
Identify the opening before discussing the repair
Use the room names from the plan and say which rooms the opening connects. “Main bedroom to ensuite, viewed from the bedroom” is enough to distinguish an ensuite slider from the wardrobe door nearby. If there are two leaves meeting in the centre, identify the leaf on the plan. On a project with several similar units, include the dwelling number as well as the room.
Describe what happens in order. Does the door start moving easily? Where does the resistance begin? Can the handle be used normally from both sides? Does the latch line up without lifting or pushing the leaf sideways? If the door is already in use and an authorised person can demonstrate it safely, one slow, ordinary cycle can give the builder more to work with than several close-ups of an unidentified scratch. Stop if the door jams or the hardware appears loose. Ask the builder to demonstrate it if the site or installation is still under their control.
Find out which parts are installed
At fix stage, ask whether the leaf, guide, jambs, floor finish, stops, latch and any soft-close hardware are the actual items that will remain. The sequence varies between projects and systems. An unfinished floor can make the current bottom clearance look generous. An unpainted leaf might travel freely until a later finish changes a tight contact point. Conversely, a guide that has deliberately been left off pending flooring can make a leaf feel unstable even though the final installation has not yet been demonstrated.
Find the door reference on the schedule or selection sheet. Ask for the cavity unit model as well as the door leaf and hardware references. Hume’s installation library publishes separate instructions for different cavity units. CS Cavity Sliders’ installation guidance describes checking operation during installation and identifies steps that take place before linings and architraves. These are examples of why the builder needs the instructions for the actual unit. The guidance for one system cannot establish the required clearances or fixing method for another.
Observe the movement without forcing the door
Start with the door at rest. From the floor, look at the exposed edges, floor transition and the point where the latch meets its keeper. If authorised, use the handle with ordinary pressure and keep fingers clear of the pocket and closing edge. Note whether the leaf touches something on the way through, whether it reaches the stop and whether the installed latch engages and releases in ordinary use. A rub near the pocket as the leaf opens gives the builder a different investigation point from a latch that misses only in the final part of closing.
Record each observation separately. “Door opens fully, scrapes at the bedroom-side jamb in the last part of closing, and latch only engages when the leaf is lifted” gives the builder a reproducible symptom. A faint sound without a visible mark is worth describing as a sound, with its location and when it occurs. Avoid driving extra fixings through the wall or trying to remove the door yourself to investigate. If a nearby wall-mounted fitting was installed between checks, record the timing and location for the builder to consider alongside the door installation.
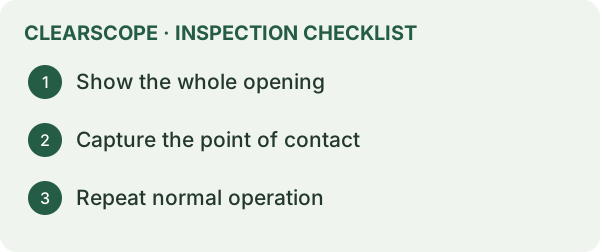
Work out what a visual visit can establish
Where the opening can be accessed safely, an inspector can observe visible alignment, marks, finishes and normal operation. It may be possible to see where the leaf touches an exposed jamb or where an installed latch meets the keeper. If a floor transition sits directly below the opening, photographs from both rooms help establish how it relates to the movement of the leaf. Where an inspection occurs before lining, more of the assembly may be visible than during a visit after trims and paint.
A functional problem at the opening does not identify a concealed fixing or establish how the pocket frame was installed. Ask the builder which parts can still be inspected through the system’s intended service access and whether any further access needs to be agreed. If work is about to cover the part being investigated, the guide to reinspection before concealment explains how to tie the return visit to the particular item and the next trade. Consumer Affairs Victoria’s guidance on building progress also explains the role of independent advice alongside the building surveyor’s inspections.
Keep the floor, trims and hardware in the same conversation
A door may be installed by one trade, the floor laid by another and the lock fitted later. Ask the builder to identify who will coordinate the finished result. If there is carpet on one side and a hard finish on the other, check that the proposed floor transition is shown clearly enough for the parties discussing the door. If a thicker finish has been substituted, ask when the revised detail was agreed and which drawing or selection record shows it.
In an ensuite, it matters whether the installed privacy hardware can be operated in the way the household will use it. At a pantry, access to the pull when the leaf is open may matter more than a lock. At a connecting passage, the leaf may need to move easily from either side. The relevant check starts with the agreed use of that opening. If there is an accessibility requirement, flag it at booking and supply the project documents that describe it. A demonstration of movement alone does not establish that an opening meets a specific accessibility requirement.
Hypothetical example — the ensuite door catches after flooring
Suppose an owner noticed that the ensuite slider moved freely during an earlier visit. After the flooring goes down, it scrapes late in closing and the privacy latch misses. The owner sends a marked floor plan, the date of each visit and a short clip from the bedroom side. The inspector sees the contact at the lower edge of the visible jamb and records that the latch misses during ordinary use. The builder then has a precise starting point for checking the finished floor interface, leaf position and hardware against the installed system.
If the builder adjusts the hardware and the door subsequently works but there is a gouge left in the paint, the operational item and the finish damage can be tracked separately. If the door only moves freely after the latch has been removed, the demonstration is incomplete. Ask for the same operation with the intended latch, stops and guide in place. If the builder finds an issue in the concealed pocket, ask how it was inspected and what record of the repair can be supplied before it is closed. Our example inspection reports show how a location, observation and follow-up can be kept together.
| What you observe | What to ask for |
|---|---|
| The leaf rubs after flooring. | Ask the builder to reproduce the contact with the finished floor in place and identify what they will adjust. |
| The latch only engages when the leaf is lifted. | Ask to see the finished door latch during ordinary operation from each accessible side. |
| A scrape disappears after hardware is removed. | Ask when the intended hardware will be refitted and when the complete assembly can be demonstrated. |
Agree what the builder will show at the next visit
Write down what will count as a useful repeat check. For example, the door will be demonstrated from both accessible sides, through its ordinary travel, with the final floor and guide in place and the privacy latch fitted. List any access limitation or finish still due. If the builder is replacing hardware, ask for the new product reference so the next visit can be scoped around what is installed rather than the original selection.
Keep the demonstration on the same list as other outstanding operational items. If the door pocket is still open, compare the work available to see with the scope of a lock-up stage inspection before booking around a finished-door demonstration. The roof hatch handover guide covers another item that is easy to miss once the house looks finished. The PCI and handover inspection service explains how a finished-stage visit fits into the broader handover. Consumer Affairs Victoria’s completion checklist is useful for the wider completion discussion with your builder, including recording outstanding matters.
Send a brief that makes the visit worthwhile
Have the address, marked floor plan, door schedule and stage date ready. Say whether the door is already installed and can be demonstrated, when final flooring and trims are due, and whether a particular part is likely to be covered before the appointment. If you have a previous report, include its item number and the builder’s response. If the only issue is an absent handle and the door cannot be demonstrated yet, tell us that up front so the timing can be discussed around the work that will actually be ready.
Ask ClearScope about a fix-stage visit if you want the accessible installation and its current operation recorded. If the concern first appears at the finished home, share the same evidence when enquiring about handover. The difference in timing matters because an earlier visit may capture parts before covering, while a later visit may be the first opportunity to demonstrate the whole assembly in the condition you will use it.
Distinguish an adjustment from a finish conflict
A gap that changes from the top of the opening to the bottom gives the installer a useful starting point. Ask whether the leaf is hanging out of square, whether the closing jamb is out of line, or whether the face of the trim is closer to the door at one height. A photograph that includes both ends of the closed leaf helps show the pattern. A close-up of the wider gap alone gives the installer very little to compare. If the leaf aligns when closed but rubs halfway into the pocket, identify the approximate point in the travel where it rubs. That may call for a different investigation from a door that contacts the closing jamb on its final approach.
Distinguish contact that was present before decoration from contact that began after the floor, seals or pulls went in. The change in sequence may help isolate what to check, although several finishing trades may have worked in the same area. Record the installed handle, the type of floor on each side, the location of any join strip and whether the leaf sits at the intended stopping position. If a builder proposes trimming the bottom of the door, ask them to confirm the leaf manufacturer's limitations and how the finished edge will be treated. If they propose moving a guide, ask them to demonstrate that the door stays aligned throughout its travel with the hardware fitted. Finally, ask which adjacent paint, skirting or floor finishes the adjustment might disturb and when those finishes will be made good. A good close-out demonstration includes the appearance and movement of the complete assembly.
Talk to ClearScope about the inspection
Tell us the address, the date that matters and the item you want checked so we can discuss scope and availability.