Dilapidation Before Demolition: Record the Adjoining Roof and Wall Junction
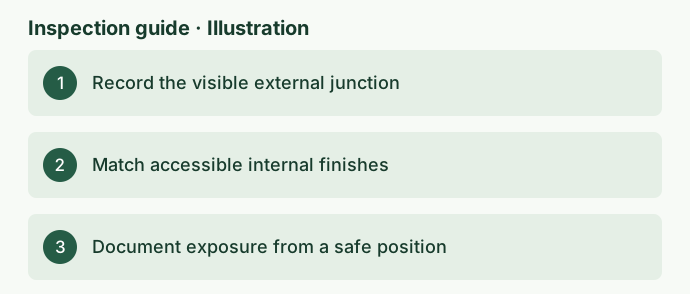
Decide which junctions need a before record
The first time you can see the outside of your side wall may be after the garage next door comes down. By then you may have lost the best chance to record how the two roofs met, where their rainwater went or whether there was already a mark inside at the same spot. If demolition is planned beside a roof and wall junction, the practical decision is which visible details to record beforehand and whether to arrange a separate visit when the interface first becomes safely accessible.
Give the inspector a plan showing what stays and what goes. Walk through the areas from the front to the rear where access is agreed, and name each junction in plain language. “Rear garage roof beside laundry wall” is more useful than “side boundary”, especially if the properties meet in several places. An independent dilapidation inspection and report records observable condition at a particular time. The demolition team and relevant specialists need their own information to plan what can safely be removed and how any retained surfaces will be protected.
Look at both sides of the interface in the available drawings and ask whether the structures are separate, physically connected or simply close together. You may be able to see overlapping roofing or a gutter disappearing behind a wall, but the hidden arrangement could differ from what the visible edge suggests. Ask the appropriate project professional to clarify the construction if it affects demolition or protection. In the condition report, describe the view and its limits so that an apparent connection is recorded as an observation rather than a verified construction detail.
Follow the visible roof and wall details
From safe and permitted viewpoints, start with a broad photo showing the adjoining roofs or roof and wall in context. Then record whatever is visible of the roof edge, gutter end, wall capping, downpipe, sheet laps or flashing. A flashing is a component intended to direct water away from a junction. Its visible edge may give useful clues about how the roofs meet, while its concealed upturn and fixings may be outside the inspection scope. Keep a photograph of any area where the angle or a covering prevents a clear view.
Record existing marks and repairs with a position that can be found again. If there is a line of staining below an older roof edge, note where it starts and ends relative to a wall return, opening or downpipe. If a previous patch spans the junction, photograph the patch and nearby undisturbed area. The patch could reflect past maintenance, an earlier leak or a change in the roof layout. A condition report can make a clear record of the patch even when there is no evidence to identify why it was installed.
Also consider what will survive as a reference after the work. A view lined up on the neighbour's shed corner may be difficult to repeat once the shed has gone. A permanent feature on the retained property, such as a window opening, often makes a stronger reference. Include photo locations on a labelled sketch if the elevations are hard to distinguish. The ClearScope example reports show how overview photos and close detail can be used together so a finding can be located without the original inspector present.
Match internal marks to the external location
Ask to include the accessible internal rooms immediately beside the junction. The ceiling line, top of the wall, cornice, upper corners and nearby joinery can show previous stains, paint touch-ups, open joints or local changes in finish. Give each mark a location within the room and relate it to the outside view where possible. Where a cupboard or lining blocks the view, the report can describe the obstruction and the area it hid. A finished internal surface may look sound at the time of inspection even when the cavity behind it is outside the scope.
Tell the inspector if a stain appears after certain weather or if an area was recently repainted. Record the account and any dated photos from the owner separately from the inspection observations. A mark visible on the day is one piece of evidence. A household account that it darkens in heavy rain is another. Both can help frame a question for a roof plumber or building consultant, while the exact entry path may remain uncertain. If the cause matters to a current repair decision, ask about separate diagnostic scope.
Illustrative scenario. A small rear garage beside a neighbour's laundry is scheduled for removal. From the yard, the garage roof appears to finish close to the laundry wall, with part of the junction hidden by guttering. Inside, an old paint patch is visible at ceiling level above the laundry door. The baseline records the patch, the viewing position and the concealed external section. If a mark later extends beyond the patch, the records help show where the visible change occurred. The cause still needs to be assessed against exposure, other moisture sources and the specialist findings.
Set a handover point for the newly exposed face
Ask who will be responsible for the interface once the adjoining structure is removed. Discuss the point in the programme when a newly exposed face could be documented if safe access and the work sequence allow. A broad image of the area before concealment may help show where earlier roof lines, fixings or coverings sat. The priority is to coordinate with the site team so the record fits the work and any protection measures. Do not delay protection, remove coverings or step into an exclusion area to obtain a photograph.
The Victorian Building and Plumbing Commission explains that a relevant building surveyor determines whether protection work is required when assessing proposed building work. Ask the surveyor or project team what arrangements apply to this particular site and who should receive records. WorkSafe Victoria's demolition guidance also emphasises planned sequences and managing stability. These are separate responsibilities from condition recording. If something looks loose, unstable or unexpectedly unsupported, raise it with the site team or relevant specialist promptly and let them determine the safe response.
It helps to name the handover in writing. State the anticipated stage, what can be seen from each safe position, and who will notify the owner if the timing changes. If the first exposure occurs in sections, ask whether the key locations can be tied to dated photographs or a simple labelled drawing. If temporary covers are already fitted when a follow-up is possible, record their visible extent and any gaps in the inspection. The guide to condition records after enabling works covers ways to label evidence if the opportunity for a true before view has passed.
Keep weather, timing and access in the comparison
If you notice fresh water marking or a visible change after demolition, record the date, weather where relevant and exact spot. Take the overview and the closer view again from safe positions. Note whether any temporary protection was in place at the time, and who supplied that information. Give the earlier inspection and photos to the person looking at the change. They can decide whether a comparison inspection, separate roof or moisture diagnosis, or both would help answer the immediate question.
Even when the location matches, the images may tell a limited story. A damp-looking patch after rain and a pale patch on a sunny day can be hard to compare in photographs. The light, viewing angle, previous coatings and any repair work should be noted. If a suspected moisture issue is intermittent, keeping a dated history can be more useful than relying on a single view taken in dry conditions. When matching frames or writing observations, the same principles apply as in a comparison inspection after nearby building work.
Evidence should follow the work as it actually happened. If a gutter was removed on one day, the wall exposed on another and a temporary covering fitted later, keep those events separate when the project record supports them. A change in appearance may have a direct connection with one event, a link with other conditions, or a pre-existing explanation. Give the specialist the sequence and avoid making a conclusion from timing alone. If urgent work is required to protect the property, ask the attending contractor what can safely be documented during the response.
Brief the inspection while both structures are still there
Send the current demolition plan, intended dates, photos of the junction where available and any known history of leaks or repairs. List the internal rooms and outside positions that can be accessed and mention where viewing requires someone else's agreement. The guide to limited or refused neighbour access explains how the scope can be documented if a useful view remains unavailable. For the wider set of items commonly considered on these jobs, see the overview of a dilapidation report before neighbouring demolition or excavation.
Ask ClearScope to include the named roof and wall interface in the baseline and say whether you want to discuss a separately scoped comparison visit. If you have a building surveyor, demolition contractor or roof plumber handling part of the job, include their role in the brief so the visual inspection fits alongside the other work. Before booking, check that the intended inspection date comes before any strip-out or removal that will change the junction you want to document. A clear record of the surviving features is much easier to assemble while those reference points are still in place.
References
Ask ClearScope about your property
Send the address, proposed work, expected start date and any access arrangements you already have.
Request an inspection