Pre-Purchase Inspections — Decayed Timber Window Sills
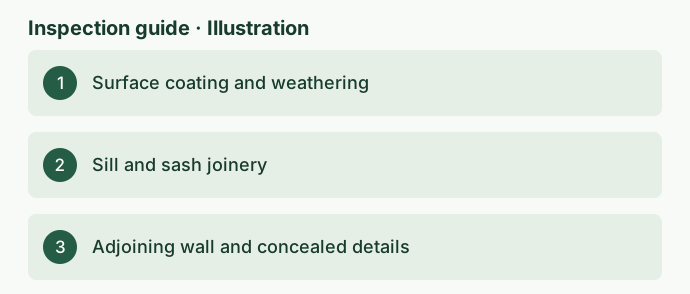
The freshly painted window looks fine in the listing photo, but the lower corner looks swollen and the sash catches when the agent opens it. Is this a straightforward maintenance job or a sign that several windows and the wall below them need work? At a Melbourne open home, you can note the location and ask for an inspection. What matters before you commit is finding out how far the visible deterioration extends and what has to come apart to establish the rest.
Start by distinguishing the sill, the fixed frame and the opening sash. The sill is the horizontal bottom part of the frame, while the sash holds the glass and moves on an opening window. On some assemblies the painted timber you can see from indoors is an internal trim piece. A sound internal trim says little about the outer sill beneath it. A rough outer sill likewise does not tell you whether the sash, glazing or framing behind it are affected. This distinction is the starting point for a useful pre-purchase building inspection and for obtaining quotes that address the same work.
Read the pattern from the bottom corners
Where the external face is safely visible, the bottom corners often provide a better view than the middle of the sill. Look for a joint that has opened between the upright frame and sill, a paint edge that has lifted with a rough surface underneath, or a section that has lost its original profile. Inside, check whether staining is confined to the glass and sill area or continues into the reveals or wall beneath. A whole-window photo and a closer photo of the affected corner can help identify the opening even if there are several similar windows in the room.
Flaking paint can come from weathering or a coating that has lost adhesion. An exposed face with visible loss of timber or an opening joint raises a different question about the condition beneath the coating. A sash that binds can have worn hardware, paint on the contact surfaces, swollen timber or a distorted frame. If the same room also shows a sticking door or cracking around more than one opening, ask the inspector to look at the wider pattern. The movement considerations in our guide to older brick homes help explain why the window symptom needs to be read in its surroundings.
Keep an opening-by-opening note rather than writing off all the timber windows after seeing one poor corner. Elevation, exposure and local details can change the picture considerably. A sill under a deep porch might show weathered paint while an exposed bedroom window on the same wall has a failed lower joint. Conversely, several recently painted windows with the same repairs along their bottom edges may warrant a broader joinery assessment. The seller's maintenance records can help establish whether the work was confined to a few sills or was part of a whole-house repaint.
Look for a credible moisture path
The location and distribution of the marks matter more than a single guess about where water came from. At an exposed window, ask whether there are visible gaps or damaged joints near the wet area, a feature above that could direct runoff toward the opening, or staining that continues down into adjacent cladding. Inside, marks concentrated at the bottom of a window that is frequently wet with condensation point to a different investigation from a stain that begins at the upper reveal after rain. Both conditions can occur at the same opening, and a dry inspection day may leave the timing unresolved.
The water-management details behind a finished opening usually can't be seen without disturbing material. An inspection can document accessible clues and explain where the evidence ends. If the seller describes a patch applied to the sill after an earlier leak, ask who investigated the source, what was removed and whether the window leaked again after later rain. The photos that accompany a repair invoice are often more informative than a short description that simply says window made good. Our buyer guide to fresh paint and patch repairs sets out how to put a finished surface in context.
Where the window borders a paved area, planter or another wet feature, note which surface is closest to the frame and whether splash marks are concentrated there. Outside the wall, a deteriorated sill can be the main item, or it can be the most visible part of a problem that also involves trim, cladding and the lower wall. Inside, compare adjacent skirting and lining for staining, swelling or prior patching where the area can be seen. A dated comparison between two similar openings is more useful to a repairer than one tightly cropped photo without a room name or orientation.
Separate maintenance, joinery and wall work
For budgeting, start with three possible scopes. First is surface maintenance where the joinery remains sound and the issue is largely weathering or coating failure. Second is a defined joinery repair, for example to a sill or lower sash joint where the rest of the assembly is suitable to keep. Third is a larger scope where the frame, adjoining wall fabric, hidden weatherproofing or other windows also require investigation. Each scope involves different access, reinstatement and trade costs. A seller's estimate to repaint one opening can't be compared directly with a quote to repair a frame and make good the wall.
Replacement brings its own questions. Ask which parts the quote includes, whether glazing is retained or replaced, and who will reinstate internal trims and external finishes. For upper-level windows, have the contractor include a safe access allowance. Where matching a profile or conserving original fabric is relevant, ask whether a joinery repair is practical before pricing a replacement unit. Heritage Victoria's repair guidance describes localised splice repairs for appropriate existing joinery. It gives a basis for asking the right questions, while the condition, heritage status and approvals for the individual property still need to be established.
When evidence points to a wider wall issue, clarify who will investigate it before requesting a fixed repair price. A joiner may be able to price the sash and frame while a separate building or water-entry assessment looks at the surrounding wall. If the same opening has a history of recurring rainwater entry, our guide to investigating recurring window water entry describes a targeted diagnostic scope. For a purchase, the immediate decision may be whether that extra investigation can be arranged before your contract deadline.
Ask the repairer to say what might change the scope once they start. One quote may include the visible sill with an allowance if the frame joints are affected. Another might assume all joinery in the room is being replaced. Put the assumptions side by side and ask whether each proposal deals with the suspected source of wetting or only the damaged timber. If you receive separate estimates for joinery and wall repairs, make sure both contractors explain who will close the opening, restore the finishes and confirm what can reasonably be checked after reinstatement.
Know what can be seen before you buy
Provide the address, photographs and room names when booking so the inspector can discuss the affected openings and access with you. Ask whether the outside can be seen safely from the site, whether the agent can arrange permission to operate the window, and whether furnishings or fitted shutters hide internal corners. An upper-level sill viewed from ground level, a sash that has been painted shut and a frame with an opaque recent coating all limit what can be assessed. Ask to have those specific limitations stated in the report, especially if you are using it to compare repair quotes.
Inspection before purchase generally depends on the agreed scope and the owner's permission. Leave windows and painted timber alone at the open home, particularly where old coatings or fragile glazing may be present. A builder or joiner can discuss the practical options for further examination with the owner. An inspector can record observations and recommend next steps without taking the window apart, scraping old paint or exposing a concealed wall cavity. The sample building inspection reports show how photos and access limitations can accompany findings and help the next person locate the issue.
Read the report in three passes. Find the actual observation, such as a visibly deteriorated lower frame corner and a sash that caught during normal operation. Then check how the possible causes and extent were qualified. Finally, look for the recommended action, which might be a joiner's assessment of affected units, further investigation of possible moisture entry, or urgent advice if glazing is loose. If the report flags areas that could not be seen, ask which of those might materially change the scope and how access could be arranged.
An illustrative decision before a contract deadline
Imagine two ground-floor windows in an older house. The shaded window has worn paint across its sill but the joints appear intact from the accessible sides. On the other opening, the lower corner has lost timber, the sash drags and there is a patched area on the internal wall below. This example is illustrative. A sensible first question is whether the two openings need different scopes. The second is whether the patch relates to the window at all. Ask for the repair history and a site assessment before assuming either a repaint or full replacement is the right allowance.
If the joiner can see enough to scope a local repair and finds no evidence at the wall interface that needs investigation, you have something concrete to take to your adviser. If the window has a wider moisture pattern or the likely extent depends on opening the wall, you may have to decide whether to seek more access, request extra time through your adviser or carry a larger uncertainty into the purchase. For help fitting that investigation into the transaction, see the difference between pre-purchase and pre-settlement inspections. A visit after the contract decision may answer a different question from an inspection while you still have time to investigate.
Give the inspector the agent's contact details, your decision deadline and the window locations. If you have a proposed repair quote already, share its scope and point out which surfaces are hidden. Ask for the report to group the observed conditions by opening so that a joiner can price the work consistently. The window-by-window repair brief is the practical outcome. It gives you a list of confirmed observations, questions for the seller and the unresolved items that could change what you are willing to budget.
References
Ask ClearScope about your property
Send the property address, your buying deadline and the areas you want checked.
Request an inspection