Knockdown Rebuild — Documenting the Vehicle Crossing Before Demolition
Before trucks start using the crossover, record what can be seen at the street edge and check which records the project needs for adjoining and public assets.
Explore dilapidation / kdrb inspection options
Mark the public and private areas on the brief
Identify the private driveway, vehicle crossing, kerb, footpath and verge near the proposed route. Ask the council which assets and permit processes apply to the address. The position of paving joints alone may be an unreliable guide to ownership. Share any project drawings and council correspondence with the commissioning contact so the requested baseline covers the relevant locations.
Record before vehicle movements or protection covers the area
Agree a date before plant and demolition trucks start using the crossing. If temporary mats, fencing or a skip will cover part of the area, coordinate the record first where practical. Provide safe access arrangements and show the inspector which crossing will be used if the property has more than one. Avoid standing in traffic or on an active vehicle route to capture a view.
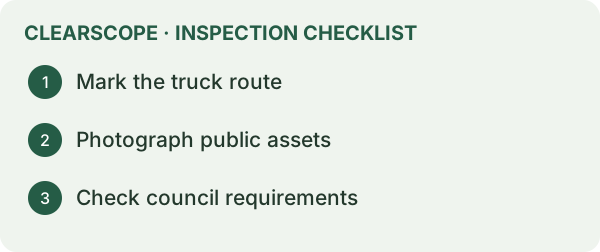
Use photos that make comparison possible
A wide view can show the crossing in relation to the frontage. Closer images can document existing chips, visible cracking, displaced edges or previous patches. Give each observation a location that a second person can find later. If a car or materials obscure part of the crossing, document the limitation and consider whether it can be photographed on another agreed visit.
Keep the council process visible
An independent photographic record can be useful alongside the council's requirements. Ask what the permit or asset inspection needs and which party is responsible for lodging information. A record from the project team does not establish that a council inspection has occurred. Where an adjoining property is included separately, agree access and report scope before attending.
An example at a corner property
If two crossovers are present, identify which one vehicles will use. Photograph the nearby kerb and footpath in a way that makes the chosen route clear. Ask whether an unused crossover is within the requested scope and show how the route relates to the site boundary and temporary fencing.
Capture adjacent surfaces as separate locations
Use a consistent label for the street name, driveway crossing and neighbouring frontage. A wide frame can establish the context. A close frame of a pre-existing broken edge can preserve the shape and location. Repeatable views make a later comparison easier.
Where public and private records diverge
The council may ask about assets outside the lot, while a neighbour's condition report may cover surfaces inside their property. Confirm each brief with the commissioning contact and keep the two sets of locations clear in the record.
What to send when booking
Provide the project address, a marked-up photo of the crossing, the first vehicle or setup date, and the adjoining areas to be considered. Ask which parts can be covered by the agreed inspection and how limits will be documented.
Draw the crossing as several connected surfaces
Start at the carriageway and trace the actual route a demolition or construction vehicle will take to the property. Identify the kerb or gutter, the crossing itself, any part of the public footpath that continues through it and the private driveway behind the boundary. There may also be a nature strip, service cover or adjacent panel close enough to warrant separate photos. Describe the positions using durable references such as a gatepost, corner or pit. If the site has two entrances, mark the intended one and whether the contractor expects to change routes for later deliveries. This gives the inspector a clearer basis for choosing views.
On a corner lot, an address alone may be a poor label for the crossing. Record the street each approach opens to and which direction a person faces when taking the overview. Start each set from a safe location and show the whole approach, then use closer views to identify damaged edges, chips or repairs. If the surface changes at the boundary, include a photo of the transition so a later reader can distinguish the private approach from the public path. Confirm the boundary and road manager through the applicable documents when those details affect the scope. The photo helps someone find the change in material and may not identify the legal boundary.
A gutter may already have a chipped lip, while a private drive has a cracked panel further uphill. If these items appear in one photograph, label them individually and show each in context. A later observation about a new chip could otherwise be attributed to the wrong surface. An overview and a detail are often sufficient for a small local issue. Longer cracking or previous patches may need views from several positions so the reader can identify where the feature ends.
Photograph before the equipment route is prepared
Ask the builder what will happen before the first machine or truck arrives. Temporary protection, a ramp or a layer of fill can hide the very surface you want to document. Early service works can also change the approach before the main demolition date. Put each setup milestone next to the surface it affects. If the council needs its own photos, get the required views and submission timing from the applicable authority. A condition report of private areas and a council submission can be organised around the same timetable where practical.
For example, a contractor plans to put a temporary ramp over a gutter so machinery can reach the site. A photograph after the ramp goes down may show its position but only part of the underlying gutter. Get the baseline before installation if possible. If the ramp is in place when the inspection occurs, record the covered length and which edges remain visible. Ask the site contact whether earlier photographs exist and retain them with dates and origins where known. Avoid describing the hidden condition from a view of the ramp. If later access is arranged after removal, record it as a later observation.
Check for parked vehicles, bins and other temporary obstructions that can affect the photographs. If one limits the view, record it before deciding whether a second visit is necessary. This matters when a vehicle hides the part of the footpath nearest a turn or overhang. Where permission and timing allow, ask the site contact to arrange a clear view. Keep image capture to safe positions. A useful file note explains which view was unobtainable and what was recorded in its place.
Match council paperwork to the road manager and work
The process for a new crossing, an alteration and possible reinstatement can differ from the arrangements for using an existing crossing. Start by confirming what is proposed and who manages the road reserve. Banyule Council's vehicle crossing and footpath guidance describes its permit process for new and altered infrastructure and how to check road management. Use the local authority for the actual site if the project is in a different municipality. Give the authority the relevant address, street and proposed works when asking what is required.
Ask the person handling the permit to confirm who will take the required pre-works photographs, whether an inspection is required and how later reinstatement should be documented. Banyule also publishes information on requesting a final inspection for eligible permit bonds. Keep the relevant permit and submission receipts with the photo set. If the builder changes the route or temporary access arrangement, ask the person managing the permit to check the effect on the existing approval. The condition report can be updated for additional accessible areas at an agreed time where a new baseline is needed.
If the crossing is shared or if a vehicle will run across adjoining private land, check how permission and access are being arranged separately. A visible worn strip can indicate where vehicles have passed, while the plan and relevant agreements are needed to understand any access rights. Ask the commissioning contact to mark the permitted route and the proposed truck path. If they diverge, raise that before the photos and before the contractor relies on the route. Our guide to shared driveways and heavy vehicle access covers the additional private areas that may need documenting.
Give the project team an evidence set they can compare
Use the same location labels throughout the project. For example, give the crossing an identifier and label the footpath panels on each side in relation to it. Keep a wide photo showing the identifiers in context and an image of any existing damage. Retain images of previous repairs separately where you can confirm their location. If damage is later reported, record when it was first seen and compare the relevant panel with the baseline. Photos taken from different positions or in different light can make a change difficult to judge. Matching the reference points can help establish whether the images show the same feature.
Consider a hypothetical chip at the lip of a gutter discovered after a crane delivery. One before photo shows the gutter clearly, while another appears to show a similar chip further along. Find the relevant view by checking the position of the gate and a nearby joint. Record which feature was visible in the baseline and which was first reported later. Any question about causation may also require the work sequence and records about equipment movements or other events. The before and after images support comparison. They provide only part of the evidence needed to explain the change.
When requesting a report, send a site plan with the vehicle route, the road name for each crossing and the earliest activity that might affect the surfaces. Include the permit scope if you already have it and say whether any area has been covered. A dilapidation inspection can then be scoped around the accessible areas you want recorded. If the works are staged, identify the date the route is expected to change. That gives the parties a chance to plan any additional condition record before the relevant area is used.
Prepare the handover before responsibility changes
A crossing can pass through several stages of use. The demolition contractor leaves, the excavator arrives and then building deliveries start. Before changing contractors, keep any agreed interim observations with the original report. Record whether a protection layer remains in place and who is responsible for inspecting it or notifying the site manager when it moves. A dated photograph of a clean footpath taken after demolition can be useful when comparing a concern raised months later. A photo showing the protective layer in place can still help establish its extent and timing, even if the surface beneath it is hidden.
If the project involves reinstatement, agree who will take the final comparative photographs and who will deal with the authority's own inspection or acceptance process. Take each comparison from a position that identifies the original surface. Where a panel has been replaced, capture its full limits and the junctions with retained paving. Where the adjacent kerb was outside the contractor's repair scope, keep its condition as a separate entry. A broad final photograph without clear reference points can leave uncertainty about which panels were actually repaired.
If you are given a contractor's report, council inspection record and independent photo set, retain all three with the dates and coverage. When a question arises, start with the record that includes the relevant surface and use the others to corroborate what happened and when. That helps avoid a discussion about the entire crossing when the issue is one panel, pit edge or section of kerb.
Talk to ClearScope about the inspection
Tell us the address, the date that matters and the item you want checked so we can discuss scope and availability.