Sagging Plasterboard Ceiling in an Occupied Home
Give the affected room space
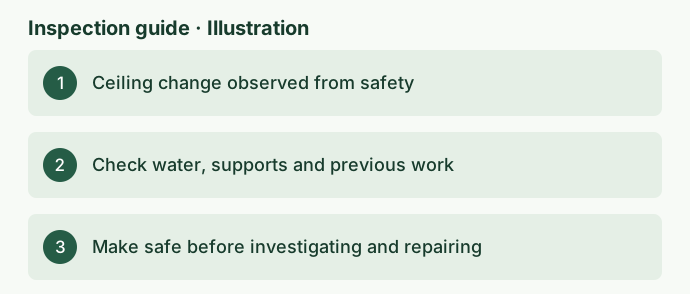
If a plasterboard ceiling has dropped or started making cracking noises, keep people out of the affected area and arrange urgent qualified advice. A newly visible bow, a separated cornice or a line of raised fixing marks can be a warning that a sheet is pulling away. A photo cannot tell you how securely the sheet is held. Avoid walking underneath for a closer look, pushing the lining back up, moving the contents below it or entering the roof space to see what is happening. Where there is an immediate threat to anyone's safety, call emergency services from a safe place.
Take observations only from a safe position. If you can already see the edge from a doorway without entering the affected area, note the room and the location of the change. An earlier family photo or listing image may show whether the edge previously looked straight. That can be enough to brief the first practitioner. Collecting more detail can wait until a qualified person has advised on safe access. A ceiling support and lining record starts with what was observed, the time it was seen and what areas were left alone.
For a property purchase, the guide to a sagging ceiling before buying discusses the decision about further checks during the sale process. Once you occupy or manage the property, the immediate question is how to keep the room out of use and arrange an appropriate response. If you rent or manage the property for someone else, pass the location and any change you have observed to the owner or property manager promptly so they can coordinate that response.
Describe the shape, location and change
People often use the word sag to describe quite different observations. One may be a shallow curve across a wide room that shows up in low sunlight. Another may be a local drop beside a cornice with paint cracking at the edge. A third may be a band of circular marks across an otherwise even surface. Note which description is closest and whether you have seen any change from earlier photographs. The timing matters more than how dramatic a single image looks, and a recently developing change warrants particular attention.
Where the ceiling is below a roof, the supporting structure, the fixing system and the plasterboard are separate things. A sheet may move away from its support while the framing remains where it was. A line across the ceiling may follow a sheet joint rather than an individual support. A change affecting several finishes can lead the practitioner to consider what those finishes connect to. The guide to ceiling supports and services before lining shows why it is easier to document how components meet before the ceiling is closed in.
A practitioner can use the shape and extent to decide what evidence is missing. A seam that opened after a recent repair may raise a question about the joint and adjoining sheet. A band of circular marks with a nearby drop calls for attention to how the lining is attached. Similar marks alone cannot establish how much of a sheet remains supported. Record any differences between rooms as well. A change confined to one corner may lead the inspection in a different direction from visible movement across an entire room or into a passage.
Check the history of water and work nearby
Write down roof repairs, insulation work, installation of lights or services, and any plumbing events before the change was noticed. If the room is below another storey, identify what is above from existing drawings or your knowledge of the layout. If a ceiling space was used for storage, tell the practitioner without going back up there to check. Information about added items is useful even when their exact position is uncertain. The practitioner can decide how to compare the timing and locations safely.
Brown rings, peeling paint or a patch that changed during rain are worth reporting separately from the shape of the ceiling. The guide to ceiling stains and roof repair history explains how an old water mark can remain after a leak is repaired. If the ceiling has dropped near a stain, finding and addressing the source of any current moisture is a different task from assessing the lining. A dry appearance on the day says little about damage already sustained or what happens during another storm.
When there is active water near electrical fittings, keep clear and obtain urgent advice from the appropriate qualified trade. Avoid handling switches or equipment in the affected area. A plumber can investigate a suspected supply or fixture issue, while a roof plumber can investigate appropriate roof drainage or weather-entry concerns. Once any immediate hazard has been dealt with, those findings can inform the assessment of the ceiling. Give each contractor the same location and event history so they are working from a consistent description.
Separate making safe from finding the cause
The first visit may be to decide how to manage access or make the affected area safe. Depending on what can be observed, the practitioner may then need a separate visit or another discipline to establish why the lining changed. Ask the first person attending what they are able to assess and what should happen before anyone enters again. Where framing or broader building movement is suspected, a structural engineer may be needed. Where electrical or water services are involved, agree which qualified trade will address those first.
After any immediate safety response, a special-purpose building inspection can be scoped around the changed ceiling and nearby accessible evidence. The brief may ask for a map of the affected area, the visible relationships with adjacent finishes and any limitations that affect the findings. An inspection from below cannot reveal every fixing, sheet edge or concealed support. Access above may also be unsuitable or unsafe. Discuss who would authorise and carry out further investigation before a ceiling is opened and how the conditions will be documented.
Illustrative scenario. A household notices a shallow drop near a cornice the week after a rain event. An older photograph shows a faint mark around a nearby light, and a more recent photograph shows a new crease at the ceiling edge. The marks and crease go into the same record as separate observations. The need to manage access comes from the ceiling change. The timing and stain guide enquiries about possible moisture. Even if the roof is repaired, someone still needs to assess whether the ceiling needs separate work.
Set out what a repair quote should explain
When an affected area is safe to assess, ask what part of the ceiling the repair covers, whether the supporting structure needs further assessment, and whether any conditions must be addressed before new lining or finishes go in. If a trade says the issue is localised, ask what was accessible and which boundaries they used to define that area. If the work needs an opening to establish the extent, ask how any extra work will be identified and communicated. These details make it easier to compare quotes that otherwise use the same phrase for different scopes.
If a previous cosmetic repair reopened or a patch changed shape, the guide to cracks that reappear after repair describes how to record when a symptom returned. Keep the earlier quote and photographs of the original area. Records may show that the last contractor was asked only to repair a visible joint or repaint a patch. That distinction helps a new practitioner understand which potential causes were investigated and where information is still missing.
Ask who will document what was exposed once work starts, particularly the condition of the sheet, any supporting members and evidence of water or previous changes. Arrange access and consent in advance where the ceiling serves common property or the affected space above belongs to a different lot. If there is an insurer or building manager involved, check their documentation needs before the relevant evidence is covered. The practical goal is a record that another person can follow when the ceiling is closed again.
Give the next practitioner a clear brief
Start with the room, when the sag was first noticed and whether it appears to have changed. Add any noises, visible gaps or fixing marks and indicate whether there has been recent roof, plumbing or ceiling work. Explain how access is currently being managed and name any trade that has already attended. If photographs already exist, label them by room and date. Where the cause remains uncertain, ask for visible observations and the scope of the next check instead of asking someone to infer stability from the image alone.
Use the ClearScope inspection report examples to see how photographs can sit alongside written observations and recommendations. A useful record identifies the part of the ceiling being discussed, which areas could be assessed and what remains concealed. Where a recommendation depends on another person's work, ask for the sequence to be clear. This helps when the first task is an urgent response, a second visit establishes the repair scope, and a later visit checks the work while the relevant parts are still visible.
If the room has already been made safe and you need a targeted building inspection, send the suburb, the location of the change and any advice received so far. State the decision you are trying to make, such as which further assessment to commission before approving repairs. That lets ClearScope confirm whether a special-purpose visit fits the brief and what access would be required.
References
Ask ClearScope about your property
Tell us where you noticed the issue, when it appears and what previous checks or repairs have been made.
Request an inspection