Bulging Bathroom Wall Tiles Outside the Shower
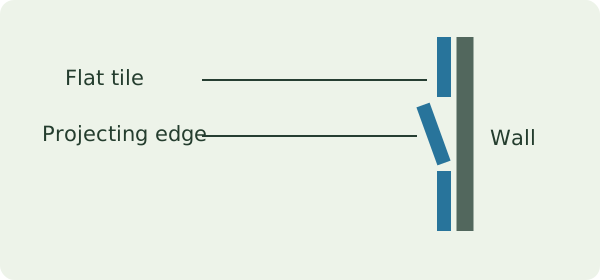
You can see a slight ridge where two rows of bathroom wall tiles used to meet flat. It is beside the vanity, away from the shower, and one grout joint has opened. Someone suggests filling the joint before water gets behind it. Before doing that, work out what you can safely see and what a repairer needs to investigate. An edge that projects into the room tells you the finish has changed, while the backing and adhesive still need separate consideration. A tile that appears loose should be treated as a potential falling object. Keep clear, restrict access to the affected area and arrange prompt advice if any part looks unstable.
Record from a place where the wall cannot fall on you
The first useful note is the location. Say whether the tiles extend overhead, are beside a regularly used doorway or are directly above the vanity. If a wide photo can be taken safely, it should show the whole wall and the adjoining surfaces. An older photo from a renovation or the sale listing may show what the wall looked like before the change. Do not stand under the affected area or press on a tile to see if it moves. Avoid tapping the wall or attempting to pull one tile away for a better look. A qualified person can advise on making the area safe and how to inspect it from there.
Distinguish a single chipped corner from a group of tiles whose faces appear to project. Side light can help you notice a shadow line from a safe position, but it can also exaggerate a small difference that has always been present. A new gap in grout or an exposed paint line can show that something changed. Photograph comparable views if you already have older images. If the tile edge looks high only because neighbouring trim has shifted, include that trim in the record. The guide to recurring cracks after repairs explains why an old repair and a fresh symptom are worth dating separately.
Ask how far the concern extends
Then describe whether the visible change continues into another row or appears around an opening, window or fitting. When several tiles are affected, a trade may want to assess a wider area before deciding that the visible edge defines the repair boundary. There may be an arrangement behind the tiles that cannot be seen until the wall can be opened safely with permission. A group of tiles can appear to lift together even when the underlying issue is confined to part of the wall. Or the wall could be altered over a broader area than the surface currently shows. Recording the limits of the visible change gives a clearer brief than telling the repairer that the whole wall is failing.
Notice the floor and adjoining walls as well. Displaced sealant or a gap beside a cabinet can help describe related symptoms, but a smaller gap may be unrelated. The guide to hollow-sounding tiles addresses a different concern and context. An audible change is not needed to substantiate a visibly projecting edge, and attempting to produce one can expose you to a loose tile. A visible height difference does not tell you the strength of adhesion or how much tile can be retained. Ask the repairer how they would establish the extent while protecting people and surfaces in the bathroom.
Consider supporting layers and past alterations
ARDEX Australia's wall tiling specification material distinguishes the surface finish from the wall substrate, membrane and adhesive. This is useful as a way to discuss the assembly with a tile or building practitioner. It does not identify the products installed in your bathroom or establish that a particular repair will be compatible. Tell the repairer if you know that the wall was extended, relined or re-tiled. A spare tile box, an invoice or photos exposing the backing may be worth keeping. Which backing material is present and whether it is sound at the affected area could change whether a local repair is practical.
Look for useful dates. If the bathroom was painted, the vanity moved or work performed in the room behind, record what changed and which surfaces were disturbed. A recent job does not automatically explain a symptom. The timing may help identify who has records or photographs of the wall assembly. The buyer guide to cracked shower tiles explains related limits when viewing a wet area. A visual assessment of an existing wall can report the accessible finish and context. It cannot confirm historic workmanship or adhesive coverage without access to the relevant concealed layers.
Treat moisture as a possibility that needs evidence
A location outside the shower is still part of a building that contains pipework and uses water. The vanity, splash at the basin, a pipe in the wall or moisture from the other side may be relevant. Note any patch that grows after a particular use, swollen joinery or a stain visible in an adjoining room. The Building and Plumbing Commission guidance on condensation and moisture damage describes different ways water can affect a building. Visible symptoms are reasons to investigate, and the pattern should be checked alongside the rest of the accessible evidence. A bulge on its own cannot establish whether water reached the backing.
If there is clear active leakage, tell the attending practitioner promptly and ask about the appropriate plumbing scope before seeking the finish repair. Damp inside the cabinet or beside the basin might deserve its own assessment. Our guide to interpreting droplets near a sink illustrates why distinguishing the location and circumstances of the water matters. Sitting in a humid room does not prove that a tile lost adhesion because of moisture. If no damp signs were visible during inspection, the report can record the conditions at that time and the limitations of the visit. It should leave open any question an appropriate test or later access could answer.
Use the observations to brief the repairers
Illustrative example. An owner finds that a tile outside their shower appears to project beside a newly installed vanity. From the doorway they photograph the affected row and a cracked joint below it. There is an older image from before the vanity work, though the lighting makes the joint hard to compare. They keep people away and contact a qualified practitioner. They explain that the tile may be loose, send the wide photo and ask what would need to be protected before the area can be made safe. They also send the vanity installation date without suggesting that the work necessarily caused the change.
Once the affected wall is safe to approach, the scope discussion may focus on local attachment, the stability of the backing or indications of a water source. An adjoining wet area and the room behind may need consideration before replacement material is chosen. A repair quote can therefore explain what access is assumed, how the repair limit will be determined, and what happens if damage extends past the first area opened. The examples of inspection findings show how an observation and a limitation can be described alongside a next step. A useful record can be given to the people quoting even if invasive assessment is still required.
Agree what happens before reinstatement
Ask which person will decide whether the exposed backing can be retained and what findings would change the repair plan. Where the scope reaches the edge of a wet area system, clarify who will assess that interface and choose compatible reinstatement. Manufacturer literature can help the installer design a solution for the actual system. It cannot establish compliance or diagnose an existing installation from a photograph. For a bathroom where the issue overlaps with ongoing moisture or mould, note any separate ceiling symptoms and discuss them individually. See the guide to repeated bathroom ceiling mould for an example of distinguishing timing, ventilation and hidden limitations.
When enquiring, send the address, approximate age of the bathroom if known, the date you first noticed a change and photos taken from a safe position. Explain whether people are still able to use the room safely and whether there is active water. Our property concern service can discuss a defined visual assessment where suitable. If the first need is emergency make-safe work, speak with a competent trade about that before trying to schedule a routine visit. An assessment can describe the accessible conditions, distinguish the visible facts from the possibilities and identify what to check next before committing to reinstatement.
Keep a copy of any quote that relies on what can be seen now. Before approving a price that assumes a small area can be reused, discuss how the trade will record the conditions once the first affected area is accessible. Photos of the exposed backing and a brief note on the extent of affected materials can give you a reference if different work is proposed later. If a spare tile is available, confirm whether it actually matches the exposed size and thickness before taking it as evidence that a small repair is possible. The final choice may depend on the condition around the opening as much as the availability of a matching tile.
Once the work scope is agreed, ask what the repairer wants you to monitor afterwards. The useful record could be one photograph from a consistent viewpoint with the date, along with a note of any subsequent change in the same joint or nearby finishes. That gives the practitioner something to compare if a symptom returns.